Drilling jar placement: How to get it right!
The drilling jar is the driller’s best friend. Just like a dog will drag its passed out owner out of danger, the drilling jar will help you if your drill string is stuck down hole. However, getting it right is all about the placement.
> Don’t know what a jar is? Read more about it here!
Why drilling jar placement is critical
Firing a jar that is not placed correctly may cause problems, as we have blogged about before. In order to achieve an optimal positioning of the jar or energizer, you need the help of someone who knows the tool.
Running a jar placement analysis will ensure correct placement and allow maximum utilization of the jar when this is needed. The analysis will help you:
- Calculate the neutral point and the impact and impulse values
- Determine the weight above and below the jar (important for jars with mechanical latches)
As long as you operate the jar within the lock settings for jarring up and down, the mechanical lock setting will prevent the jar from firing unexpectedly.
Disadvantages of lack of drilling jar placement
There are serious disadvantages of not running a jar placement analysis. The jar might end up at the neutral point of the string (where you transition from tension to compression) and cause fatigue of the tool. That basically means that the tool is ruined and rendered useless.
Also, when you have no control of the weight below the jar (problems with the lock/latch) this may cause an uncontrolled fire of the jar.
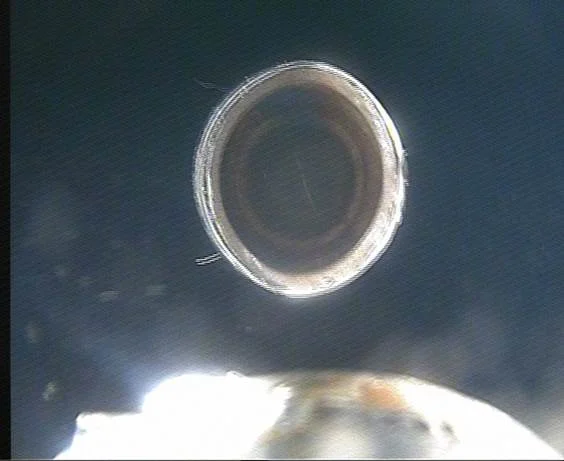
One possible consequence of misplacing the jar in the neutral point over a longer period of time can be that the jar parts – in other words, you have a twist-off. Here is a ROV-photo of a parted jar in the wellboredown hole:

Some rules of thumb regarding drilling jars
Here are some beste practices for use of jars:
- Place 5-6 singles of heavyweight drill pipe (HWDP) between the jar and accelerator for maximum impact
- Place at least one stand of HWDP or drill collar (DC) above the accelerator
- Avoid placing stabilizers or other Bottom Hole Assembly (BHA) tools above the tool, that have a larger Outer Diameter (OD) than the jar
- Replacing the jar after 350 hours (max drilling hours standard temperature) is recommended. However – in scenarios with higher temperatures, meaning 150+ degrees, the recommended limit is reduced to 200 hours. (Note: For use in wellbores with high temperatures, the jar must be prepared for this type of operations. Usually the jar provider will then equip the jar with a high temp seal kit instead of the standard seal kit before it is sent to the rig.)
Troubleshooting a non-responding drilling jar
There are several reasons for why a jar does not work as it should:
- Incorrect weight is applied (due to incorrect calculations)
- Pump open force
- Drill string is stuck above the jar
- Jar is not cocked
- Not waiting long enough for jar to fire (horizontal drilling)
BHA considerations for jar placement
- Run jar above possible stuck points, but as low as possible
- No stabs above jars, no x-sectional change in direct connection with the jar
- Run jar and energizer as standard package (there is no place in the wellbore where the energizer is not useful)
- Consider hammer mass (for DCs or HWDPs)
- Stay away from the neutral points
- Choose jar size / hole size, i.e. no 8″ tools in 26″ hole
- Consider stuck pipe mechanisms
Good luck with the jar placement. For more input on jars and energizers, also check out this excellent blog post on why Your drilling jar is your insurance policy.
Topics: Drilling Equipment, Down Hole

By: Tor Helge Hestetun & Trond Inge Mitchell
Tor Helge and Trond Inge work as Sales & Project Engineers at Odfjell Well Services in Stavanger, and worked together on the ENI Boulder Buster project.


